The famous Swiss vintage glider known as ESSO was designed by Arnold Degen in 1941 as a promotional model for the European branch of Exxon. I have chosen this model as another vintage project for the incoming season which is close and will be actual in a few weeks sometimes. Esso is made of plywood (thickness about 1 – 1,5 mm is mostly used), spruce spars and longerons, covered with silk or ‘japan’ paper. Wingspan spreads to 1960 mm and finished model prepared for flight, weighs about 750 g.

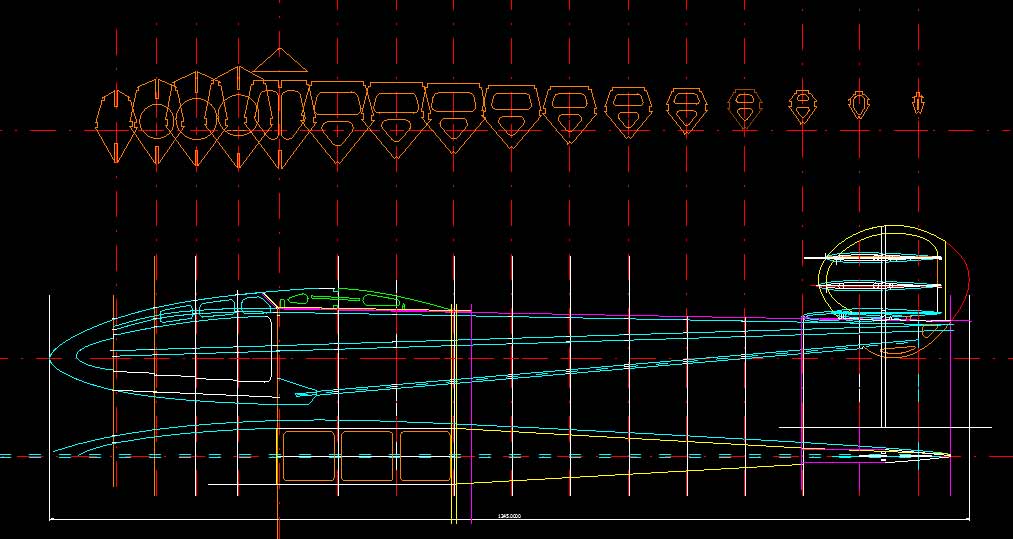
I have first obtained proper plans from Peter Renggli, who is a member of the MG Bern (Switzerland) club and vintage aeromodeller too. Although the plan itself is in perfect condition and contains a detailed step-by-step guide to building, I took advantage of milling the parts using a CNC machine. It was required to reconstruct the whole plan using CAD software.

All necessary parts are cut out and we start the job by completing the fuselage. This step is divided into two stages glued together when both are finished. The nose consists of the following parts: Nr. 1, 3, 4 and 7 are made of 4 mm thick and 5 – 6 of 1 – 1,2 mm plywood. Drill two mounting holes for tow hook fastener into part 1 (check the plan and locate the proper towing hook position).
Do sand all parts. Now let’s bring these together and glue carefully. Do not forget to check the relative perpendicularity of each part.
Pin two 3 x 5 mm longerons (Nr. 20) on the working top. Glue bulkheads Nr. 8 – 18 to the longerons and check whether those are perpendicular (this is one of the basic rules to achieve nicely built unwarped frame). Take two 3 x 8 mm longerons (Nr. 19) and glue these on the bulkheads. Do not glue the last tail joints together (bulkhead Nr. 18), leave these now free as we come to this point later again.

We are now ready for fuselage assembly. First glue nose part to the tail by the 3 x 8 mm longerons. Prepare one 4 x 4 mm (Nr. 21) longeron, carve it to proper shape to fits slot in the nose part (where the tow hook is located). Lay the fuselage upside down on the working top again and glue longeron No. 21 into the nose part (Nr. 1) and on bulkheads. Shape both (Nr. 20) longerons to required shape and glue into nose bulkheads (Nr. 3 – 6).

Cut out and prepare fuselage reinforcement Nr. 23. Recommended material thickness is about 1 – 1,2 mm and I chose the latter. When ready, glue this part on the top of the fuselage and check for axial symmetry.

Cut (shorten) nose longerons to align with the nose bulkhead Nr. 3. Prepare nose parts Nr. 2 made of white wood (lime) and glue onto the place. Carve then the nose block nicely (do not hurry, measure twice) to obtain a streamlined shape (use a small plane to do rough shaping).

We will finish the fuselage and build the tail section (fin and tailplane) in the next chapter.
Resources:
